Friday, March 2, 2012

Grain-Free, Gluten-Free Oreos


Yes. Grain-Free, Gluten-Free Oreo sandwich cookies. I get all giddy inside just looking at that picture. As a kid, I loved oreos. I, along with the rest of the world, used to separate each cookie - one plain chocolate wafer and one with cream - and lovingly dunk them into a large glass of milk. I daresay my favorite part was drinking the milk at the end, when all of the chocolate wafer pieces would be in that last sip. Yum. So, you can imagine my excitement when homemade oreo recipes started popping up all over the place. It seems like so many food blogs have their own version of the perfect chocolate sandwich cookie. But, unfortunately for me, none of these recipes were Kristin-approved. After some very fun experimentation, I have come up with this delicious, completely grain-free recipe. 

The chocolate wafers are refined sugar free as well as dairy free. The creme is another story. I will update as I continue to experiment with that. After many batches of these, the hubby and I decided the most delicious and oreo-like cookies were the ones that were not as crunchy. We like the cookies firm, but not too crisp. The creme is the perfect match for the wafer. These taste just like Oreos, but without all the chemicals. A grain-free Oreo cookie. Two years ago, I didn't think this was possible! Now that I have written about how wonderful these are, I think I may have to go make another batch now!

A few tips:
1. Don't skip the freezing step. If you do, it will end in disaster (or just ugly cookies).
2. Watch the cookies very carefully while they are in the oven. Rotating your cookie sheet 180 degrees is very important. Seven minutes for each rotation was perfect in my oven. 
3. Allow your cookies to cool completely. Don't get too excited! It's worth the wait! 
4. I highly recommend using a pastry bag to distribute the creme onto the cookies. I tried spreading it on with a knife, and it was very difficult. The pastry bag was so much easier, and the cookies looked prettier too.


Grain-Free, Gluten-Free Oreos
3/4 cup almond flour
1/2 cup cocoa powder 
1/2 tsp baking soda
1/2 tsp salt
1/3 cup grapeseed oil
1 egg

1. In a medium bowl, combine almond flour, coconut flour, cocoa powder, baking soda, and salt, and set aside.
2. In the bowl of a stand mixer, combine grapeseed oil, coconut sugar, and egg, and mix on medium speed until combined.
3. Reduce speed to low, and gradually add in the dry ingredients until all are incorporated.
4. Transfer dough to wax paper, and roll into a log about 1 1/2 - 2 inches in diameter. Flatten the ends, and wrap wax paper around dough and freeze for at least 3 hours.
5. Once dough is frozen, cut dough into very thin slices - 1/8" - 1/4" each, and place on parchment lined cookie sheet. 
6. Heat oven to 375. Bake cookies for 6-8 minutes, then rotate cookie sheet 180 degrees and bake for another 6-8 minutes. The cookies should be firm, but still give just a little. If they give too much, bake them for 1-2 minutes longer.
7. Allow cookies to cool on the cookie sheet for 5 minutes before transferring to a cooling rack. Cool completely before adding the creme.
8. While cookies are cooling, make the Oreo filling! (See below)

Creme Filling
1/4 cup (1/2 stick) unsalted butter, room temperature
1/4 cup shortening (I use organic palm shortening)
2 cups powdered sugar (make sure it is organic and corn-free!)
2 tsp vanilla extract (make your own!)

1. Mix together butter and shortening on medium-high speed until fluffy. 
2. Reduce speed to medium-low, and gradually beat in the powdered sugar.
3. Reduce speed to low and add vanilla.
4. Increase speed to high until fluffy.

To assemble the cookies
1. Fill pastry bag with creme. I did not use a tip on my pastry bag; just cut about 1/2" off the bottom. 
2. Turn cookie upside down, and pipe a large dollop of creme onto the cookie.
3. Place another cookie (equal in size) on top of the creme to create sandwiches.
4. Continue with remaining cookies.
4. Eat and love.

Makes 12 cookie sandwiches


Monday, February 27, 2012

Spaghetti Squash with Shrimp


Hello friends! It has been quite a while since I have posted a recipe for you. The month of February has been much busier than I anticipated! With two out of town conferences and exciting changes at work, I haven't had the opportunity to spend as much time in the kitchen. However, I have some very yummy recipes for the days ahead.

I am excited to share this recipe review with you today: Spaghetti Squash with Shrimp! This was a delicious recipe that I stumbled upon a few weeks ago. The hubby and I have already made this twice in two weeks. It is so yummy and very easy to make. It also makes great leftovers!

Click here to visit the original recipe. See below for my version, with just a few modifications.

Spaghetti Squash with Shrimp
1 medium spaghetti squash
1/4 cup olive oil
2 - 3 cloves garlic, minced
1/2 lb shrimp, shelled and deveined
2 Tbs fresh lemon juice
1 Tbs oregano
1/2 tsp salt
1/4 tsp pepper
2 small tomatoes, seeded and chopped
1/2 package (or 2 large handfuls) spinach, washed
1/4 cup toasted pine nuts
1 cup crumbled feta cheese

1. Cut spaghetti squash lengthwise. Scoop out seeds and discard. Place squash face down in a baking dish filled with 1/2 inch of water at 375 degrees for 45 minutes, or until soft.
2. Meanwhile, heat oil over medium heat and sauté garlic. Add shrimp, lemon juice, and spices. Sauté until shrimp are pink.
3. Add tomatoes and spinach and cook until spinach is wilted, about 1-2 minutes.
4. Using an oven mitt to avoid burning yourself, gently scrape out flesh of spaghetti squash with a fork.
5. Combine squash, shrimp mixture, pine nuts, and feta in a large bowl and toss to combine. Serve hot.

Thanks to cooks.com for this awesome gluten-free recipe!

Wednesday, February 1, 2012

A Trip to the Grocery Store

Grocery shopping can be a daunting task when transitioning to a gluten-free diet. I’d like to share my typical grocery trip with you – which parts of the store to stick to and which to avoid.

My favorite grocery  store, as I have shared many times, is Whole Foods Market. It is easiest to find everything I need at Whole Foods. While it is possible to find certain items at other stores (sometimes even at lower prices), I often leave feeling frustrated that they didn’t carry many of the necessities that Whole Foods always has in stock.

The best guideline for gluten-free (and any healthy eating) grocery shopping is to stick to the perimeter of the grocery store.

First stop: produce! While we receive most of our produce in our weekly co-op share, I do supplement with organic items in the produce section. It is important to double check that the produce you are purchasing is organic. Even Whole Foods carries both organic and conventional produce. The PLU number for organic produce always begins with a 9 and is five digits long, as opposed to conventional produce which starts with a 4 and is only four digits long. The PLU number for genetically modified produce (avoid at all costs) begins with a 3 and is also four digits long. Look for produce that is local and organic. The majority of our grocery bill is from produce. This is REAL, living food and should be the bulk of our diets.

After visiting the produce section, I continue around the perimeter of the grocery store towards the meat and fish counter. I only buy fish on an as-needed basis as I feel it tastes best when fresh and do not like to freeze it. I do like to keep a bag of wild caught shrimp in the freezer for last minute meals. They thaw quickly and are easy to make for a quick meal. Whenever purchasing seafood, avoid farm raised in favor of wild caught. (Read why here!) My hubby and I eat meat once or twice a week, and we are very careful to only consume organic meats. I purchase grass-fed beef and free-range organic chicken. Both the beef and chicken keep well in the freezer. Since we do not eat meat with every meal, I only need to visit the meat counter once a month or so.

In most grocery stores, the dairy section is also on the perimeter of the store, usually just past the meat counter. I suggest eating dairy only on a limited basis. As with produce and meats, it is extremely important to eat organic dairy. My hubby and I are not big milk drinkers, so our dairy purchases consist of butter and cheese, with the occasional need for sour cream (check for corn starch or corn syrup!) or heavy whipping cream. In regards to eggs, usually stored next to the dairy, I purchase organic cage-free brown eggs. If you are looking for an excellent cow milk substitute, I recommend trying Almond Milk or Coconut Milk. I have completely eliminated soy from my diet, as it is a common allergen and is often genetically modified.

One of the great things about shopping at Whole Foods is their bulk section. I like to keep many different kinds of organic nuts in my fridge. Purchasing nuts in bulk is a great way to save money. Be careful in the bulk section, though, because there are many processed foods in addition to nuts, dried fruits, and flours lurking there. Some Whole Foods stores carry Almond Flour in the bulk section. It is a reasonable price, but is usually located right next to corn starch. This poses a possible problem with cross-contamination, so I recommend purchasing all Almond Flour through Honeyville Grains online.

I also purchase many canned items (although their fresh counterparts are always a better option): canned tomatoes and tomato sauce (ALWAYS buy organic when using canned tomatoes), garbanzo beans, black beans, kidney beans, and coconut milk. I also keep many organic oils on hand - olive oil, grapeseed oil, coconut oil, and sesame oil.


In the frozen section, we stock up on frozen fruit, the perfect addition to any smoothie! Frozen organic fruit is an excellent way to eat fruit that isn't currently in season. It is also an affordable way to stock up! 

There are several other items that I recommend for a gluten-free and grain-free diet. These include:
-Plantain chips – I purchase Inca brand plantains or Turbana Plantains (double check ingredients of other brands, sometimes fried in corn oil) – great alternative to tortilla or potato chips
-Lara Bars – see this post on why Lara Bars are great!
-almond milk
-baking items – chocolate chips (Enjoy Life! brand is gluten-free and soy-free), organic and fair trade cocoa powder, coconut sugar (sometimes cheaper to purchase Madhava Coconut Sugar on Amazon), Celtic or Himalayan salt, Coconut flour

While the gluten-free and organic grocery bill is usually more than the typical American diet, it is well worth the benefit to your health. We have found that we now eat out less, appreciate food more, and cook more delicious meals than ever before. I love going to the grocery store and seeing all the beautiful, real, and wholesome food. When we provide our bodies with food that nourishes us instead of depleting us, we will stave off disease, have more energy, and enjoy food more fully!

Saturday, January 14, 2012

Black Bean Soup

We have had some lovely cold weather here in Houston! Our week started out quite warm for January, humid and in the 70's. But by Wednesday, cooler weather was here with highs in the mid-40's! Ahhh, it is nice to have at least a little winter weather here. Too bad it won't stay for more than a few days. The only thing predictable about Houston weather is that it is unpredictable. Sunny and warm one day, raining and cold the next. Anyway, the cold weather was just begging for a warm, comforting soup. I looked at the veggies from my co-op share as well as the beans in my pantry, and voila! Black bean soup. Perfect for a cold winter night.

Black Bean Soup
1 Tbs olive oil
1 onion, chopped
2 stalks celery, chopped
3 carrots, chopped
5 garlic cloves, minced
1-2 jalapeños (depending on how spicy you want it), de-seeded and finely chopped
1 can organic diced tomatoes
3 cans black beans, drained and rinsed
2 cups vegetable broth (check to make sure it is corn free!)
2-3 tsp chili powder (depending on how spicy you want it)
1 tsp cumin
1 tsp salt
1/2 tsp coriander
cilantro, for garnish
sour cream, for garnish
lime wedge, for garnish

1. Heat olive oil over medium heat in a large stockpot. Add onion, celery, carrots, and jalapeño and cook until onions are translucent and carrots are tender.
2. Meanwhile, puree tomatoes (with juice) in food processor or blender.
3. Add spices, broth, beans, and tomato puree to stockpot. Cook on medium heat for 15 minutes.
4. Transfer half of soup mixture to blender and puree until smooth.
5. Return puree to pot and continue to cook for 5 minutes.
6. Serve hot with a dollop of sour cream, cilantro, and a lime wedge.

Saturday, January 7, 2012

Almond Crusted Tilapia


My friend Jamie is pretty awesome. She found this recipe and was nice enough to allow me to share it with all of you! Jamie and her husband are some of our closest friends. They are vegetarians (well, they eat fish, so that makes them pescatarians?), and they have recently gone gluten-free. Jamie knows so much about cooking and about eating organic; she was a huge help to me when I started changing the way I eat. A few months ago, she and her husband had me and the hubby over for dinner. She altered a recipe from the blog Green Lite Bites to be grain-free, and it was delicious! I have made it half a dozen times since that night, and I hope you enjoy it as well. Thank you, Jamie, for this delicious and healthy tilapia recipe!

Almond Crusted Tilapia (adapted from Green Lite Bites)
1/2 cup almond flour
2 Tbs whole flaxseeds
2 Tbs freshly grated Parmesan cheese (optional if you are dairy-free)
1 tsp garlic salt
1 tsp onion powder
1 1/2 tsp paprika
1/2 tsp celery seed
1/4 tsp nutmeg
pinch salt and pepper
1 pound tilapia filets (3-6, depending on the size)

1. Line a baking sheet with foil. Turn oven to Broil.
2. Combine all ingredients except tilapia in a shallow dish (I use a pie plate).
3. Press each tilapia filet into mixture and coat evenly on all sides.
4. Place tilapia on foil-lined baking sheet.
5. Place baking sheet on rack in middle of the oven. Do not place close to the top.
6. Boil fish for 3-4 minutes per side.

Monday, January 2, 2012

Gluten Free in Fredericksburg, Texas

Happy New Year everyone! My hubby and I just celebrated our 1 year anniversary in Fredericksburg in the Texas Hill Country! We stayed at a beautiful bed and breakfast called Hoffman Haus just off Main Street. Their chef did a wonderful job preparing gluten-free and grain-free breakfasts for us both mornings. I'm so excited to share our gluten-free finds with you!


We dined at Navajo Grill on our first night in Fredericksburg. The staff was very knowledgeable about gluten; they even made a note on our reservation and knew not to serve us bread! Hubby and I ordered the same meal - we both started with the Butternut Squash Soup, and then had the filet with mashed potatoes and zucchini. For dessert, we had the Chocolate Fix, which was a completely flourless cake with pecan crust; what a treat to get gluten-free dessert at a restaurant! Everything was completely grain-free AND delicious. I do not have a picture of the food, because we were both so busy enjoying the experience that documenting with photos was the last thing from either of our minds. Don't worry, we realized this later and all of the other meals have photos! :)


The next day, we had lunch at this adorable cafe called Beat the Wheat (cutest name ever!!!). It is a completely gluten-free kitchen! This was exciting. Not only are they gluten-free, but there is NO corn in their baked goods. Double exciting. Hubby chose chicken salad sandwich, and I chose the turkey panini. (Note: the bread is not grain-free; it does contain rice, which I eat on rare occasions.) We also got a snickerdoodle cookie to share, but I do not have a pic of that as we gobbled it down before the camera had a chance. The triple exciting news about Beat the Wheat? They ship! For information, visit their website.

Chicken Salad Sandwich

Turkey Panini

After our awesome experience at Beat the Wheat, we decided to tour several of the area wineries. We had a great time tasting the different Texas wines. 


Here is a list of the wineries we visited:
For dinner, we ate at the adorable Sunset Grill. Our waitress was so sweet and helpful with my food allergies. She made sure to check with the chef on anything she was unsure about. I have to admit, I had rice again at this restaurant. The hubby and I both got sushi, and it was very yummy. While I did not get sick, I do know that rice is something my system can only handle every now and then. The restaurant did an excellent job of making sure everything was gluten-free and corn-free. I started with this delicious, completely grain-free salad:


Next, the hubby and I both had sushi (with no soy sauce - it contains wheat!):

his

hers

 And lastly, we finished with homemade ice cream - no corn syrup! Hooray!

peppermint - for me


Peanut Butter - for my hubby

Lastly, I'd like to share a little more about our great bed and breakfast. Our room was beautiful, and the location was so convenient to restaurants and shopping. Our breakfasts both mornings were delicious and completely grain-free. The first morning we had crustless spinach quiche (no pic, sorry), and the second morning we had mushroom omelets. I highly recommend the Hoffman Haus! It's a great place for gluten-free travelers.

They deliver breakfast in a picnic basket!

We had a wonderful time in Fredericksburg; it was the perfect place to celebrate our first anniversary.


Wednesday, December 14, 2011

Sugar Cookies


Christmas is my favorite time of the year! I love the excitement and anticipation, the brisk, cool air, the Christmas carols playing everywhere, the decorations, and all of the Christmas cheer! I decorate my Christmas Tree on the day after Thanksgiving, with the Mariah Carey Christmas album blaring (who doesn't love singing "All I Want for Christmas is You" at the top of their lungs?). My favorite Christmas album, though, is Andrew Peterson's "Behold the Lamb of God," which tells the story of advent through song. I love the opening phrase of the album:

"Gather 'round, ye children, come
Listen to the old, old story
Of the power of death undone
by an Infant born of Glory.
Son of God, Son of Man"


My family loves celebrating together with sweet treats, singing, laughter, and the joy of the true meaning of Christmas. One of our "sweet treat" traditions are Christmas tree sugar cookies from my Aunt Kathy. I don't know what she does to those cookies, but they are AMAZING. So this year, I decided to make a gluten-free version of these delicious cookies so I won't miss out on all the Christmas tree cookie fun. These gluten-free sugar cookies are dairy free and refined sugar free. They taste great with or without frosting! And the best part is, they taste so close to my Aunt's classic cookie that my cousins might not know the difference!


Sugar Cookies
1 cup almond flour
1/2 cup coconut flour
1/2 tsp salt
1/2 tsp baking powder (make your own!)
3/4 cup grapeseed oil
1 egg
1 cup coconut sugar
2 tsp vanilla extract (make your own!)

1. In a medium bowl, combine almond flour, coconut flour, salt, and baking powder. Set aside.
2. In a large bowl, combine grapeseed oil, egg, coconut sugar, and vanilla and beat on medium speed until thoroughly combined.
3. Reduce speed to low, and gradually mix the dry ingredients into the wet ingredients until everything is incorporated.
4. Form the dough into a disc, and wrap in wax paper, and then in plastic wrap. Refrigerate for a minimum of 3 hours.
5. Preheat oven to 350. Line a baking sheet with parchment paper.
6. Place dough between two sheets of wax paper. Roll dough to 1/8 inch thickness, and cut with cookie cutters. (You will not need to flour the dough if you roll between wax paper.)
7. Carefully transfer cut dough to parchment lined baking sheet.
8. Bake for 7 - 9 minutes, being careful not to over bake.
9. Cool on the pan for 5 minutes before transferring cookies to a cooling rack.
10. Cool completely before serving or frosting.

Makes 2 dozen cookies

Sugar Cookie Frosting
This frosting is taken from All Recipes. I used Almond Milk and India Tree natural food coloring,  so it is dairy free! I highly recommend using natural food coloring over regular food coloring, which contains harmful chemicals. I also used Spectrum Organic Shortening, which is dairy free and soy free! Instead of soy oil, it is made with palm oil.

4 cups powdered sugar (make sure to buy organic for corn-free)
1/2 cup shortening
5 tablespoons almond milk
1 tsp vanilla extract
food coloring, if desired

Cream shortening, powdered sugar, and shortening until smooth and creamy, about 5 minutes.
Stir in vanilla extract. Color the frosting in smaller batches.
Frost cookies with a thin layer of frosting.

Monday, December 5, 2011

Autumn Chopped Salad & Poppy Seed Salad Dressing

I have a new obsession: Pinterest. It is so much fun! It was on Pinterest that I found this beautiful salad with pears, cranberries, pecans, and feta, and knew I had to try it. The recipe calls for two dressings - poppy seed and balsamic vinaigrette. Since I don't use store bought dressings because of their mysterious ingredients, I decided to come up with my own poppy seed dressing for this yummy looking salad. I have since made this salad twice - in one week! Instead of using both dressings, I used just the poppy seed dressing, and it was great.

Click here to go to the Autumn Chopped Salad. 

Poppy Seed Salad Dressing
1/3 cup white wine vinegar
2/3 cup olive oil
1 tsp dry ground mustard
2 green onions, white parts removed
1/4 cup +  1 Tbsp agave nectar
1 tsp salt
1 Tbsp poppy seeds

1. Combine vinegar, dry ground mustard, green onions, agave nectar, and salt in a blender and blend on high until combined.
2. Reduce speed to medium, and very slowly drizzle in olive oil. 
3. Once combined, turn blender off and stir in poppy seeds.
4. Chill for at least 30 minutes before serving.

Wednesday, November 30, 2011

Pumpkin Cream Cheese Cake Balls


I hope you and your family had a very happy and relaxing Thanksgiving, full of gratitude and blessings!

I first saw these pumpkin truffles on the Whole Foods recipe site. These little pumpkin bites are originally called truffles, but I think they taste more like cake balls. The Whole Foods recipe calls for graham cracker crumbs and gingersnap cookie crumbs, but the idea of pumpkin truffles sounded so good that I knew I would have to make some gluten-free adjustments. My family (even the gluten-eating ones!) loved these gluten-free Pumpkin Cream Cheese Cake Balls, which I brought to our Thanksgiving celebration.

Tips:
-Double check ingredient list on cream cheese - almost all conventional cream cheese brands contain high fructose corn syrup, and even some organic brands have wacky ingredients
-The original recipe calls for orange zest, but I left that out. If you try this recipe with the zest, please leave a comment and let me know how it turns out!
-I used my cookie scoop to form the balls, and they were way too big. I recommend using 1/2 tablespoon of dough per ball, or aiming to make them each 1 inch in diameter.

Pumpkin Cream Cheese Cake Balls (based on Whole Foods Market's recipe)
1 10 oz package of white chocolate chunks
1/4 cup pumpkin puree
1/2 cup almond flour
1/3 cup coconut sugar
1 1/2 tsp cinnamon
pinch ginger
pinch salt
2 oz. cream cheese, softened
1 Tbsp coconut oil

1. Melt 1/2 cup of white chocolate chips (either in a double boiler or in the microwave), stirring frequently and being careful to not burn.
2. In a medium bowl, combine the melted chocolate, pumpkin puree, almond flour, coconut sugar, cinnamon, ginger, salt, and cream cheese. Stir until thoroughly combined - about 3 minutes. Mixture should be smooth.
3. Cover and chill until firm enough to form into balls, at least 3 hours.
4. Line a tray or glass baking dish with parchment paper. Form balls with the dough 1 inch in diameter (about 1/2 tablespoon of dough), and place on parchment paper. Freeze overnight.
5. After balls have frozen, melt remaining white chocolate chunks (about 2 cups) and coconut oil (either in a double boiler or in the microwave). Working quickly, drop the frozen balls, one at a time, into the melted chocolate, carefully coating entirely in a thin layer of chocolate. Remove any excess chocolate from balls before transferring back to the parchment paper. Repeat with remaining pumpkin balls.
6. Chill for at least one hour, then serve and enjoy!

Sunday, November 27, 2011

Roasted Carrot Salad


I am so excited to share this recipe with you! My hubby and I have been getting carrots in our produce share from Rawfully Organic Co-Op every week for almost two months now. While carrots are great, and I enjoy carrots, we had so many carrots in our fridge that I didn't know what to do! We couldn't seem to eat (or smoothie) them fast enough. So last week, I decided it was time to find a recipe that featured carrots - and lots of them. After some quick googling, I came upon this amazing roasted carrot salad. Oh my goodness. It is delicious AND easy AND gluten free! The only change I made was to substitute feta cheese for blue cheese, which is sometimes aged on bread and therefore not safe for people with gluten intolerance. Feta was a great substitute!

Here is a link to the original recipe: Roasted Carrot Salad: Allrecipes.com

I will be making this again soon - and I can't wait! Who knew that carrots, almonds, feta, cranberries, and arugula would all taste good together?!? I hope you enjoy this recipe as much as I do!

Thursday, November 17, 2011

Beef and Bean Chili


This simple chili recipe from Whole Foods is easy to make and perfect for fall. It has a short ingredient list, as well as only 10-15 minutes of prep time. I always purchase grass-fed beef (see why here) , as well as organic beans, onions, tomato sauce, garlic, and spices. The chili makes our home smell so delicious while it is simmering! My hubby gets so excited when he comes home and smells chili cooking. I like to make a double batch and freeze the extras in individual serving containers to take for lunches; it is always a good idea to plan ahead for gluten-free lunch at work!

Tips: 
When I make this chili, I use an entire 15 oz. can of both kidney and black beans. I have found that adding the spices at the same time as the meat, rather than before, is much easier. I omit the cilantro and the hot pepper sauce, and instead serve with grated organic cheddar cheese on the top. I highly recommend this easy gluten-free, grain-free chili!

Monday, November 14, 2011

Chicken Tortilla Soup


This Chicken "Tortilla" Soup is a staple in our home. My mom used to make this for my family all the time, before any of us discovered our gluten allergy. Although the original recipe, from Houston's Rotisserie for Beef and Bird restaurant, didn't actually contain tortillas, it was not naturally gluten-free. Since we loved this soup so much, my mom and I worked together to transform this into a gluten-free, grain-free recipe.

This soup makes great leftovers, and also freezes very well. My hubby and I often take a big batch with us when we go out of town. It reheats very nicely in the microwave, and still tastes great!

I highly recommend purchasing organic canned tomatoes, as well as free-range chicken and chicken broth. Make sure to double-check the ingredients in the chicken broth - it often contains corn (and sometimes wheat) in some form.

We love this Chicken "Tortilla" Soup - and I hope you do too!

Chicken "Tortilla" Soup (based on the recipe from Rotisserie for Beef and Bird)
3 Tbs olive oil or butter
4 garlic cloves, minced
6 ribs celery, diced
1 large onion, diced
1 16 oz bag carrots, peeled and sliced
2 lbs free-range chicken breast, diced
1 14 oz can diced tomatoes - NOT strained
1 32 oz box free-range chicken broth
1 tsp cumin
1 tsp chili powder
1 tsp salt
1 tsp lemon pepper
Sour cream
Shredded cheese
Avocado, diced

1. Heat 2 Tbs olive oil or butter over medium-high heat in a large stockpot. Add garlic, celery, onion, and carrots and cook until vegetables are soft and onions are translucent.
2. In a separate skillet, heat just enough olive oil to cover bottom of pan. Add chicken and cook until browned.
3. Add cumin, chili powder, salt, and lemon pepper to chicken and stir to incorporate.
4. Add chicken mixture, tomatoes (with their juice), and chicken broth to the stockpot with the vegetables. Stir and bring to a boil.
5. Reduce heat to low, cover, and simmer for one hour.
6. Serve hot, garnished with shredded cheese, sour cream, and avocado.

Wednesday, November 9, 2011

Strawberry Cupcakes with Strawberry Buttercream Frosting


Strawberry Cupcakes have been haunting me for months now. I’ve made countless batches – tweaking and changing things along the way to come up with the perfect version. My hubby has been kind enough to taste every one of these experiments, some of which didn’t taste like cupcakes at all! All of the experimenting was worth it though, because this Strawberry Cupcake is the amazing result. All of my taste testers (gluten-free and gluten-eating alike!) loved this cupcake.

These cupcakes are dairy free, refined sugar free, and of course gluten and grain free! I love using coconut sugar because it has a low glycemic index and is also full of nutrients. It is very similar in texture to refined white sugar, which makes it easy to use.

The strawberry frosting does contain refined powdered sugar as well as butter, but it completes the cupcake. I’ve been experimenting with vegan frostings as well as natural sweetener frostings, but am still working on it. For now, this strawberry frosting is the perfect addition to its cupcake counterpart. 

A few tips:
-Allow all ingredients to be room temperature before starting (especially eggs, almond flour, and coconut flour).
-Use frozen strawberries instead of fresh strawberries – the strawberry flavor is more concentrated.
-Use organic powdered sugar (sifted) for the frosting – it does not contain corn starch and produces a grain-free and more delicious frosting.
-The lemon zest brings out the flavor of the strawberry. I guess this is not a tip, but an FYI. :)
-Allow the cupcakes to cool completely before icing them. This is always difficult for me. I want to eat them right away. Trust me, it's better if you wait.

Strawberry Cupcakes
1 (10 oz) bag frozen organic strawberries, thawed
1/2 cup almond flour
1/3 cup coconut flour
2 tsp baking powder (I make my own so that it is corn free)
1/2 tsp salt
1/4 cup grapeseed oil
3 eggs, whisked
1/2 tsp lemon zest

1. Preheat oven to 325 degrees. Line a cupcake pan with 8 cupcake liners.
2. Place strawberries into a food processor or blender and puree. Reserve 1/2 cup for the cake, and save 2 Tbs for the frosting.
3. Combine almond flour, coconut flour, baking powder, and salt into a medium bowl and set aside.
4. In a large bowl, beat eggs and grapeseed oil on medium speed until combined.
5. Add coconut sugar and lemon zest to egg/oil mixture on medium speed.
5. Reduce speed to medium-low and gradually incorporate the dry ingredients, making sure to scrape down the sides of the bowl so everything is evenly combined.
6. Stir in 1/2 cup of strawberry puree to batter.
7. Pour batter into prepared cupcake liners and bake for 27 - 32 minutes, or until a toothpick inserted in center comes out clean.
8. Let cupcakes cool in the pan for 10 minutes before transferring them to a cooling rack. Cool completely before frosting.

makes 8 cupcakes

Strawberry Buttercream Frosting (based on this recipe)
1/2 cup butter (1 stick), room temperature
1 1/2 cups organic powdered sugar, sifted
2 Tbs strawberry puree

1. Beat butter on medium-high speed until fluffy.
2. With the mixer still on medium-high, slowly add the sifted powdered sugar. You may need more or less to get the desired consistency. Beat until well combined.
3. Turn mixer off and stir in strawberry puree.

Makes enough for 8 cupcakes

Sunday, November 6, 2011

Green Breakfast Smoothie


This past summer, my hubby and I purchased a Vita-mix Blender. We use it at least once a day, often more than that, and it is my favorite kitchen appliance. We love to make smoothies with raw fruits and vegetables, because we are getting tons of nutrients from the whole fruit or the whole veggie.

My sweet hubby makes a smoothie for us every morning before work. We use whatever fruits and vegetables we have at the time, so our smoothies often depend on the season. This Green Smoothie is our go-to breakfast smoothie. It is a great way to start the day and will keep you full until lunch!

Green Breakfast Smoothie
apple juice as a base (optional) - enough to cover blades of blender
1 banana
1 orange, lightly peeled (try to peel the zest and leave as much of the pith or “white stuff” as possible)
1 apple, cored
1 pear
1 small – medium zucchini
1 large handful spinach or 2 kale stalks, stems removed
½ cup frozen peaches or frozen pineapple
4-6 ice cubes

1. Add ingredients to Vita-mix or other high powered blender in the order listed.
2. Blend on high for 60 seconds or until smooth.
3. Serve immediately.

Serves 2

Friday, November 4, 2011

Against the Grain Pizza


I recently stumbled upon Against the Grain Gourmet frozen pizzas while on a trip to Whole Foods. I checked the ingredients and, to my surprise, there were no grains at all! They are true to their name "Against the Grain," and use no alternative grain flours. The only flour in their pizza crust is Tapioca Starch! There are also no gums or binders. The pizza comes with tomato sauce and a mix of parmesan, cheddar, and mozzarella cheeses. All ingredients are safe for me to eat, and this pizza is delicious. I like to add my own toppings (usually some extra freshly grated parmesan, Applegate Naturals pepperoni, mushrooms, and red onions). We cook it directly on the oven rack for 15 minutes to get the crust nice and crispy, and it is divine! I'm thrilled to have found this grain-free pizza for an occasional dinner treat, and I highly recommend it to you.

Against the Grain pizzas come in two kinds - Three Cheese and Pesto. Several Whole Foods locations in Houston carry them in the frozen section (I have found them at both the Montrose location and Bellaire location). Make sure to call the Whole Foods near you to double check for and/or request Against the Grain!

Wednesday, November 2, 2011

Chocolate Chip Cookies


These chocolate chip cookies are THE BEST grain-free cookies ever! In my gluten-eating days, I made homemade chocolate chip cookies all the time - probably once a week. They were delicious, but they were making me sick! These gluten-free, corn-free, processed sugar-free chocolate chip cookies taste incredible, and are healthy too. I worked on this recipe for weeks to get it just right, and hope you enjoy it! (And just a warning, the cookie dough is amazing - don't eat too much or you won't have any cookies!)

Chocolate Chip Cookies
1½ cups Almond Flour
½ cup Coconut Flour
1 tsp salt
1 tsp baking powder (I make my own so that it is corn free)
1½ cups Coconut Sugar
½ cup (1 stick) butter, melted and cooled
1 egg + 1 egg yolk
1 Tbsp Vanilla Extract (Make your own!)
3/4 cup chocolate chips (I use Enjoy Life - they are soy free!)

1. Preheat oven to 350 degrees, and line a baking sheet with parchment paper.
2. In a medium bowl, combine almond flour, coconut flour, salt, and baking powder. Set aside.
3. In the bowl of a stand mixer, combine butter and coconut sugar on medium speed.
4. Add eggs and vanilla and continue beating on medium speed until smooth.
5. Reduce speed to low, and gradually mix the dry ingredients into the wet ingredients.
6. Stir in chocolate chips.
7. Scoop cookie dough onto baking sheet, 2 inches apart, using a cookie scoop. Flatten the cookies with your hand - they will not spread on their own.
8. Bake for 13 - 17 minutes.
9. Cool and serve.

Makes 2½ dozen cookies


Friday, October 28, 2011

Cauliflower Rice


Back in high school, my mom decided that we should all go on the South Beach Diet as a family. One night, she made Mashed Cauliflower, which was supposed to taste like Mashed Potatoes. Our whole family (including my mom) decided the mushy cauliflower tasted nothing like delicious mashed potatoes, and we never had that recipe again.

I was skeptical when I first saw this recipe for Cauliflower "Rice" on Elana's Pantry. Rice is not something I ate frequently during my grain-eating days, so I did not feel the need to substitute anything else for it. However, I was interested in getting more veggies into my diet, and cauliflower seemed like a good new vegetable to try. This recipe is amazing - it tastes so much like rice and has lots of flavor. It is one of my hubby's favorite side dishes.

It is easy to make, and you can process the cauliflower in a blender in small batches if you do not have a food processor - just be sure to watch it carefully. Elana's recipe serves four; click here to go to the recipe. Enjoy this healthy and delicious side dish!

Wednesday, October 26, 2011

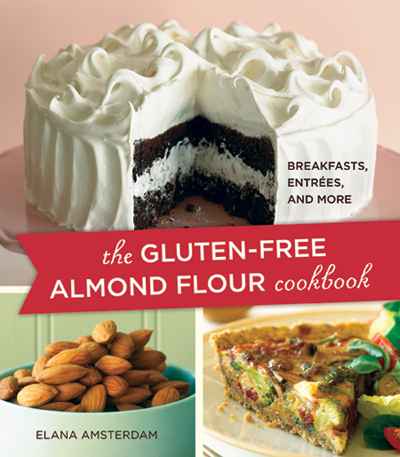
The Almond Flour Cookbook


Elana Amsterdam's cookbook has been so important for my transition to a grain-free lifestyle. She has so many great and easy recipes. She does not use any processed sugar; everything is sweetened with agave nectar. There are breakfast recipes, main dishes, breads, and tons of desserts. I use this cookbook all the time and can't recommend it enough if you are gluten-free.

Last night, I made the Simple Drop Biscuits from this book to go with Butternut Squash Soup, and they were very yummy. (I usually use half of the agave when making this recipe.)

You can purchase the cookbook on Amazon - it's almost always under $10! Cook your way through this delightful cookbook filled with wonderful, grain-free recipes.

Classic Drop Biscuits from The Almond Flour Cookbook - great with soup!

Monday, October 24, 2011

Roasted Butternut Squash Soup


I love the winter squash that start appearing in my co-op share at the start of Fall. Acorn squash, butternut squash, spaghetti squash. Squash. It is delicious. (And fun to say, too! Squash squash squash!)

What better way to celebrate the beginning of Fall than with soup? Although it is still in the high 80's here in Houston, I am grateful for the cool morning breeze that reminds me the summer heat has past. Welcome, Fall! Please bring some cool weather to Texas!

This Butternut Squash Soup is not only grain-free, but is vegan as well! It has a nice kick from the curry powder and a sweetness from the cinnamon. Hope you enjoy this fall soup!

Roasted Butternut Squash Soup
2 medium butternut squash
3 Tbs olive oil
1 medium onion, diced
3 cloves garlic, minced
1 can coconut milk
2 cups vegetable broth
2 tsp curry powder
½ tsp grated fresh ginger
2 Tbs agave nectar
1 tsp salt
Dash cinnamon

1. Heat oven to 400 degrees
2. Half squash lengthwise and scoop out seeds. Place on baking sheet cut side up. Poke holes with fork and lightly sprinkle with salt.
3. Bake for 45 – 60 minutes, until squash is very tender.
4. Scoop squash flesh out into large bowl and set aside.
5. Heat olive oil in large stock pot over medium heat. Add onions and garlic, and cook until onions are translucent.
6. Add squash, coconut milk, vegetable broth
7. Blend with immersion blender. (You could also do this in small batches in a regular blender)
8. Once the soup is smooth and completely blended, add curry powder, ginger, agave, salt, and cinnamon. Stir well to incorporate all ingredients.
9. Bring to a boil, then reduce to low and cover. Let simmer for 15 – 20 minutes.
10. Serve hot, with an extra dash of cinnamon as a garnish.

Friday, October 21, 2011

Food for a day away

What do you do when you have to be out all day, away from your kitchen, with no access to a fridge or a microwave, and no opportunity to eat out? It is very difficult to be gluten-free at all-day events that serve donuts in the morning and sandwiches for lunch, especially when you can't get in your car and go get some safe food during the lunch break. Tomorrow, I will be at a work event all day, and I am planning ahead! This is my go-to stash for situations where I can't eat safely, and also cannot bring my own prepared food such as a salad or soup.

Here are my tips for eating at a conference, workshop, a long day-trip in the car, or event where you do not have access to a fridge or your car:
1. Plan ahead. Stock your pantry with these items so you are prepared in the event you need backup food.
2. Eat a large breakfast that can sustain you well in to the morning. Tomorrow I will be having a hearty smoothie with fruits and veggies.
3. Choose items that have plenty of protein and can carry you through the day.
4. Pack in containers that you can easily carry with you. While it would be nice to bring your jar of almond butter along with a spoon, it's not very practical.


My food choices for tomorrow are:
1. Larabars. Oh my goodness. I. Love. Larabars. They are made from nuts, dried fruits, and spices. THAT'S IT! They are very healthy and are also delicious! My favorite flavor is Gingersnap. I always keep Larabars in my pantry for when I will be out and know it will be a long time between meals. They are a great snack. You can order them online here; they are also available in most grocery stores.
2. An apple with almond butter. This is one of my favorite snacks at home too! I love the Justin's Almond Butter individual packets - they are easy to pack and also easy to put on an apple as you eat. My favorite flavor is Maple Almond Butter - all safe ingredients.
3. Trail Mix. I made this trail mix in the bulk section at Whole Foods. It consists of organic raw pecans, cashews, and almonds, along with dried cranberries and organic chocolate chips.  A word of warning - double check ingredients every time. I have been to one Whole Foods where the banana chips were completely safe, and I happily added them to my mix. However, this time, the banana chips had been processed on the same equipment as wheat and were therefore cross-contaminated. So, no banana chips for me. (I think I might like this trail mix better without them though!)

Tomorrow, I will be a happy, well-fed gal. And I'm always more pleasant to be around when I am well-fed. Leave a comment if you have any other great ideas for on-the-go gluten-free foods!